For the favors, I chose to make monster pops (aka: Oreo pops). I think they turned out so well. Check out the process!
1. Gather your ingredients.
You need...
- Double Stuf Oreos
- Wilton's Candy Eyes
- Wilton's Candy Melts (in a fun color) - one bag yielded about 13 pops
- popsicle sticks, lollipop sticks or wooden coffee stirrer sticks (depending on length desired)
- sprinkles
2. Prepare the Oreos.
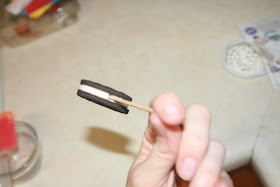
Gently slide the popsicle sticks into the Double Stuf Oreos without pushing through the other side. Double Stuf Oreos must be used because it allows enough room for the stick. Some of the cream filling may come out of the other side. If it does, just use another popsicle stick to press it back into place. If one side of the cookie comes loose, gently press it in place.
Here are all of my Oreo pops standing at the ready.
3. Melt the candy.
I used the Wilton Candy Melts for this project but you could certainly use another brand or a good quality chocolate. Place your candy into a heat safe bowl, with plenty of room at the top. Place the bowl into the microwave set for 50% power for 1 minute. After that time, remove the bowl and stir the candy. If it is not yet melted (which mine was not), continue to melt at 30 second intervals. Be certain to stir each time to evenly heat the candy and prevent overheating. Continue stirring until the candy is smooth and lump-free.
4. Dip the pops.
Grab the pops by the sticks and enrobe the cookie with the melted candy. Rather than merely plunging the cookie into the bowl, I did a combination of dipping and drizzling. I used a spoon to make sure every part of the cookie was covered to prevent air from entering and making the cookie soggy. Pay close attention to the rims of the cookies and the base by the stick.
The melted candy was also rather thick. This was not a problem for me as my goal for the project was to create monsters. I wanted the pops to have visible texture. Also, the cookies were dark and the candy was a light color so I preferred a thick coating to ensure the cookie did not show through. If you are looking for a thin shell with a smooth finish, you can add a little vegetable shortening as you melt the candy.
You will also need to decide how you wish to let your pops set up. I chose to lay mine down on a waxed paper lined cookie sheet. However, if you do not want the back to be flattened, you can certainly tap off all excess candy and stick the sticks upright into a piece of styrofoam until set.
5. Embellish the pops.
While the candy is still soft, begin to add any decoration you see fit. I chose to use the candy eyes sold by Wilton. I also looked in the pantry for something I could use for a mouth and found chocolate sprinkles to be rather effective for the purpose. Allow the pops to set up completely before moving them for storage or wrapping for gift-giving. I placed mine into the refrigerator for 15 to 20 minutes to set before I packaged into cellophane bags.
6. Store and wrap for giving.
You can purchase lollipop bags if you would like. I found the pops fit perfectly. I secured the base with a piece of bakers twine. I also chose to display the pops upright in a piece of styrofoam. The foam will be placed into a shallow dish and covered colorful candies like Skittles or M&Ms to add more color. The pops can be stored in an air-tight container, at moderate temperatures (low 70s) and out of direct heat/light for a couple of weeks.


No comments:
Post a Comment