Monday, December 31, 2012

Happy New Year!

New Year's Eve has never really been a big celebration night for me but since little people have joined our family, we celebrate!  The kiddos are 3 and 1 so we stick with the east coast time zone and do our countdown early. We always keep things simple, as Christmas zaps us.  Here is how we rang in 2013...

Attire

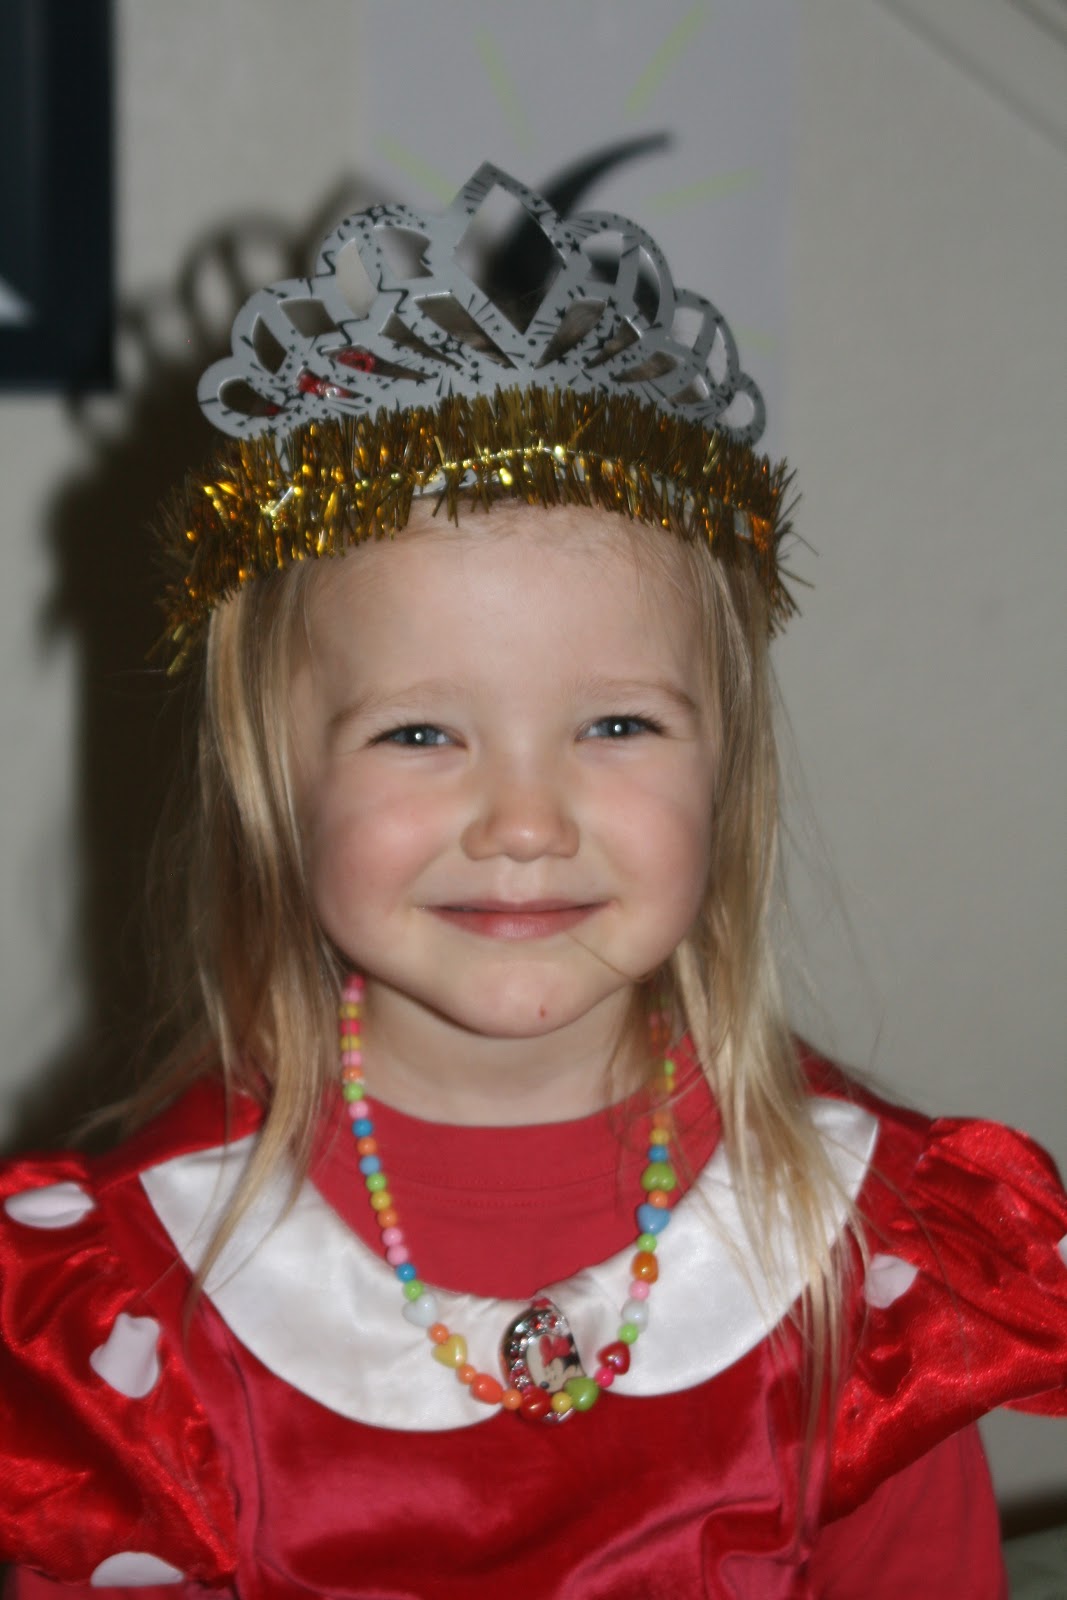
Wee One wanted to wear a party dress with jewelry.  After her bath, Daddy helped her put on her Minnie Mouse dress since it had the fullest skirt.  She promptly added beads and a sparkly hair bow.  She was on Cloud 9.  Let the fun begin!


Food

We did a small buffet of treats which was open for the kids.  They thoroughly enjoyed getting to visit it as much as they wanted, without having to ask for help.  The table included:
  • Cracker, cheese and salami tray
  • Ham, cream cheese and pickle roll-ups
  • Warm dip with toasts
  • Fruit salad in champagne flutes and topped with whipped cream
  • Monkey Bread with cream cheese frosting (recipes follow)
  • Hot air popcorn
  • Juice & milk


Monkey Bread

1 loaf Bridgford frozen bread
1 stick butter, melted
1 cup brown sugar
4 tsp cinnamon

Thaw and rise bread according to package directions.  Preheat oven to 350. Spray a bundt pan with cooking spray.  Use kitchen shears to cut the dough into small chunks of dough.  Place half into the bottom of the pan.  Mix the melted butter, brown sugar and cinnamon together, then spread half over the dough in the pan.  Add another layer of dough chunks and spread the remaining butter mixture over the dough chunks.  Cover with plastic and allow to rise again for an hour.  Remove plastic and bake for 25 - 30 minutes.  Promptly remove from oven and turn over onto a pretty plate.  Top with cream cheese frosting and serve immediately.

Cream Cheese Frosting

4 oz softened cream cheese
1/4 cup softened butter
1 1/2 cups powdered sugar
1 1/2 tsp milk
1/2 tsp vanilla extract

With a mixer, combine all ingredients until smooth.

Decorations 

We knew we were going to have some special treats for NYE but we did not put much thought into anything else.  About 3pm, I decided decorations were needed.  I quickly printed a fun "Happy New Year" banner from Spoonful, cut it out and had it hanging in no time!  My girl and I added a few streamers and balloons to crank up the fun.


I also printed numbers onto 8 1/2" by 11" printer paper and hung them around the room.  At the countdown, the family walked from number to number and counted together.  It never hurts to include academics at a party!


Activities

Rather than asking the kids to think about resolutions, we asked them their wishes for 2013.  We used this wishes template from Spoonful.

We also did a short scavenger hunt for "NYE" items.  The children were given a list of items and a bag to collect them once found.  Being so young, they needed a little assistance but it let the whole family play together.


Balloon Drop

To add some excitement to the evening, I chose to do a small balloon drop.  Having never done one before, I reviewed this short video tutorial.   I did not have a fishing net, and didn't wish to run all over town looking for one, so I used kitchen garbage bags.  I cut along one side seam and the bottom seam of two bags and taped them together to make one long sheet.  Then, I taped the corners of the  plastic sheet to the ceiling, forming a hammock.  I filled the hammock with balloons and taped two strings to one end of the hammock.  At the end of our countdown, I pulled on the strings and wallah... balloons everywhere!  The kids went crazy!!


We also pulled streamer pops, wore party hats, and blew our party horns.


We let the kids play in the balloons for a bit but it didn't take long until they were tired out. We ended the evening with a sparkling cider toast and a prayer for our family for the new year.


Best New Year's Eve EVER!!!


Happy 2013!


Tuesday, December 25, 2012

Christmas Dinner

We had a quiet Christmas this year... we stayed home.  The entire family has colds and we are a sight (and a sound) to behold.  This November, my mother celebrated her 11th anniversary with her transplanted kidney and liver.  We still try to do all we can to keep our germs to ourselves and protect her as much as we can.  Although we missed our extended family, it was nice to tuck in rather than make the 3 1/2 hour drive with two little ones and a dog.

We also got to do a non-traditional Christmas dinner.  We chose to have homemade lasagne (which turned out better than it ever has), strawberry salad and Italian pull-apart bread.  We enjoyed a divine chocolate cream pie for dessert.

I saw a recipe for Italian pull-apart bread on Pinterest a few weeks ago.  It looked pretty good but I thought, "How easy! I don't need to pin that!"  Well, it seems I did because I failed to buy all of the ingredients and we didn't have any parm, romano or asiago on the premisis.  Rather than skip it, we improvised and I am glad we did.  This is our version of Italian pull-apart bread... and it is pretty incredible.

Italian Pull-Apart Bread


1 loaf frozen bread (like Bridgeford)
1 Tbsp Italian herbs (oregano, basil, rosemary) - fresh, chopped is best so double if using fresh herbs
1/2 tsp garlic powder (could use fresh, minced or crushed)
1/2 stick unsalted butter, melted
1/2 - 3/4 tsp sea salt
pepper to taste
Olive Oil

Remove bread from freezer and allow to thaw in refrigerator overnight.  Coat a bowl with olive oil and place bowl inside and cover with a piece of plastic wrap.  Place in a warm spot and let the bread rise until doubled in size.

Preheat oven to 350 degrees.  Use a pair of kitchen shears and cut dough in small chunks, about the size of a small meatball.  Mix herbs, salt and pepper into melted butter and dredge the small bits of dough into the butter before placing evenly into a bundt pan sprayed with cooking spray.  Drizzle dough with remaining butter mixture.  Cover with plastic wrap and allow the dough to rise a bit longer.  Bake for 20 - 25 minutes until the top is golden.  Remove from oven and turn out onto a large plate.  Serve immediately and be prepared for the little rolls to disappear quickly!


Thursday, December 13, 2012

It's the Holiday Season!!!


In lieu of a long post, I will just leave you with a fantastic recipe I will be trying out this weekend...


Wow... I think my taste buds just went into overdrive.  They are dancing with anticipation upon my tongue.  Mmm.... maple bacon.....

Doesn't this look ridiculously incredible?!  

 Photo Courtesy of www.kingarthurflour.com

T-12 Days until Christmas!

Monday, September 24, 2012

It's a Monster Bash!

Whew!  What a party!!

My son just celebrated his first birthday.  While kicking around on Pinterest some time ago, I really fell in love with the monster parties I encountered.  So, monsters became the inspiration behind this party.  Let me share!


Goodie Bags-
There aren't many young children in our family so the goodie bags were rather easy to assemble.  Because I despise little junk, I tried to add things which would be fun but would not be trampled under foot once taken home.


I purchased the Cookie Monster bags from the dollar bins at Target, along with the Cookie Monster notepad and monster water bottle.  The little "paint a car" and "make a monster mask" crafts were purchased from a clearance end cap at Target.  The bubbles came from Wal-Mart.


I also made a coloring book from monster clip art I found on Google Images.  I added simple sentences to each page since many of our young guests are just beginning to read... or will soon be learning how. I purchased Crayola crayons during the back to school sales.

(Monster image from: http://www.graphicsfactory.com/Clip_Art/Cartoon/0799-Happy-Green-Monster-Celebrates-Birthday-With-Cake_377915.html)


Decorations-
Because I had to prepare everything at home then travel 3 1/2 hours for the actual party, I made sure everything could go up and be taken down easily and in a short period of time.  I knew I wanted to feature bright colors and keep the decorations simple.  I decided to make monster faces and have each feature a different photo of my son throughout his first year of life.


It turned out to be a GREAT idea!

I traced a form onto colored cardstock then proceeded to cut out each face.  I embellished each monster with googly eyes, teeth cut from white cardstock and a photo of my son printed out from a color printer and cut into an open mouth shape.  What a job!!  I was careful to feature a photo of each guest so everyone would have fun remembering special moments with my son.  Monsters were displayed from clothespins attached to jute cord.  The cord was draped along the walls at the party.  Everyone loved the visual experience of seeing my son grow from one picture to the next.  When the party was over, I carefully took the monsters down, placed them into gallon-sized Ziploc bags and will save them for his 16th or 18th birthday.  :-)


Cake-
For my children's first birthday parties, I am sure to include an option which doesn't stain.  I am not a fan of having to clean greasy red frosting out of a light colored shirt or digging dark chocolate cake out of little ears and hair.  I prepared banana cupcakes with banana frosting (his great grandmother's recipe).  I tinted the frosting a light green to add a little color but ensure my little guy wouldn't need a bath half-way through the event.  To make the cupcakes more thematic, I fashioned cupcake picks from cardstock, googly eyes, a wooden sandwich pick and a little hot glue.  I added the mouths with a fine Sharpie. 


I really loved all of their expressions.  It was also difficult to decide if I liked one, two or three eyes best!

Here is the recipe for the Banana Cake with Banana Frosting...

Cake:
1 1/2 cup sugar
1/2 cup butter
2 eggs
2 cups flour
1 tsp baking powder
1 tsp baking soda
1/2 tsp salt
3/4 cup milk
1 cup mashed ripe bananas
1 tsp vanilla
1 cup chopped walnuts (optional)

Frosting:
1 pound powdered sugar (about 3 cups)
1 stick softened butter
1 mashed ripe banana
1 cup chopped walnuts (optional)

Grease and flour cakepans.  Mix ingredients and beat with an electric mixer on high.  Bake at 350 degrees 35 - 40 minutes.  Let cool 10 minutes in pan then cool completely on a rack.  Prepare frosting by blending the first three ingredients, then stir in half of the nuts.  Spread onto cooled cake and garnish with remaining nuts.


Game-
I made the conscious choice not to produce any elaborate party games.  Why? Because my son is just one and I did not want to pack anything else into the car for the long trip.  I did, however, produce a Monster Quiz from questions I gathered from various websites (Site 1, Site 2, Site3).  Each guest got one double-sided quiz, a pencil and 10 minutes.  At the end of that time, everyone corrected their own papers.  I was impressed with their monster knowledge!  My parents did well but my grandma whipped them both.  We had three tied for second place!!  Winners received a $5 gift card to that famous coffee house with the mermaid logo.

(monster image from: http://storybird.com/aaronblecha/artwork/tuba-monster/)
 

Favors-
In a previous post, I shared how I fashioned the party favors - Monster Oreo Pops.  They took a little time to prepare but were not difficult.  They were a BIG hit with the guests.  I also added little tags which thanked the guests for sharing in the celebration.  I took the extras to work where they were promptly consumed so I would not be tempted. 

(Monster image from http://feetintwoworlds.wordpress.com/2012/02/22/counselor-self-care-battling-the-insomnia-monster/)


Happy birthday, little man!  We love you!!!


Thursday, September 20, 2012

Monster Oreo Pops

My son will be celebrating his first birthday this weekend.  When he turned 6 months old, I began researching party themes.  I had a very difficult time deciding since there are people who create some very elaborate and captivating parties for children.  I am unable to spend the time and expense many do so I opted for a theme which would be bright, fun and very BOY... MONSTERS!!!!

For the favors, I chose to make monster pops (aka: Oreo pops).  I think they turned out so well.  Check out the process!

1.  Gather your ingredients

      You need...
  • Double Stuf Oreos
  • Wilton's Candy Eyes
  • Wilton's Candy Melts (in a fun color) - one bag yielded about 13 pops
  • popsicle sticks, lollipop sticks or wooden coffee stirrer sticks (depending on length desired)
  • sprinkles


2.  Prepare the Oreos.

Gently slide the popsicle sticks into the Double Stuf Oreos without pushing through the other side.  Double Stuf Oreos must be used because it allows enough room for the stick.  Some of the cream filling may come out of the other side.  If it does, just use another popsicle stick to press it back into place.  If one side of the cookie comes loose, gently press it in place.


Here are all of my Oreo pops standing at the ready.


3. Melt the candy.

I used the Wilton Candy Melts for this project but you could certainly use another brand or a good quality chocolate.  Place your candy into a heat safe bowl, with plenty of room at the top.  Place the bowl into the microwave set for 50% power for 1 minute.  After that time, remove the bowl and stir the candy.  If it is not yet melted (which mine was not), continue to melt at 30 second intervals.  Be certain to stir each time to evenly heat the candy and prevent overheating. Continue stirring until the candy is smooth and lump-free.


4.  Dip the pops.

Grab the pops by the sticks and enrobe the cookie with the melted candy. Rather than merely plunging the cookie into the bowl, I did a combination of dipping and drizzling.  I used a spoon to make sure every part of the cookie was covered to prevent air from entering and making the cookie soggy.  Pay close attention to the rims of the cookies and the base by the stick.

The melted candy was also rather thick.  This was not a problem for me as my goal for the project was to create monsters.  I wanted the pops to have visible texture.  Also, the cookies were dark and the candy was a light color so I preferred a thick coating to ensure the cookie did not show through.  If you are looking for a thin shell with a smooth finish, you can add a little vegetable shortening as you melt the candy.


You will also need to decide how you wish to let your pops set up.  I chose to lay mine down on a waxed paper lined cookie sheet.  However, if you do not want the back to be flattened, you can certainly tap off all excess candy and stick the sticks upright into a piece of styrofoam until set.


5. Embellish the pops.

While the candy is still soft, begin to add any decoration you see fit.  I chose to use the candy eyes sold by Wilton.  I also looked in the pantry for something I could use for a mouth and found chocolate sprinkles to be rather effective for the purpose.  Allow the pops to set up completely before moving them for storage or wrapping for gift-giving.  I placed mine into the refrigerator for 15 to 20 minutes to set before I packaged into cellophane bags.


6.  Store and wrap for giving.

You can purchase lollipop bags if you would like.  I found the pops fit perfectly.  I secured the base with a piece of bakers twine.  I also chose to display the pops upright in a piece of styrofoam.  The  foam will be placed into a shallow dish and covered colorful candies like Skittles or M&Ms to add more color.  The pops can be stored in an air-tight container, at moderate temperatures (low 70s) and out of direct heat/light for a couple of weeks.


Tuesday, August 21, 2012

Cooking with Kids

My Wee One loves to cook.  Well, let's rephrase this... she loves to cook with Momma.  She will often tell me, "I help you," then happily push a chair to the counter to take part.  However, when I ask her to help me she squeals with delight and enthusiastically runs to wash up and begin.

I too love having Wee One help but mealtime prep isn't always a kid-friendly time for help.  Be it hot ovens, flaming stove tops, or sharp knives, there are a number of safety hazards I must consider in order to protect my budding chef.

Here are my tips for cooking with kids:

  1. I often ask my girl what she would like to have for ____________  (breakfast, lunch, dinner, snack).  I offer 2 - 3 options based on the ingredients we have on hand.  She is a more enthusiastic participant when she gets to choose and likes what we are preparing.
  2. I make sure we wash our hands together to stress the importance of food safety.  It is never to early to start!  This cute video teaches kids about proper hand washing techniques.
  3. We put on our super cool aprons to protect our clothes.  She LOVES her apron from Williams Sonoma.
  4. I try to introduce my kids to a wider variety of fruits, vegetables, meats, nuts, grains and dairy products.  I also use REAL food, rather than engineered/convenience products, and talk about the growers who produced the food.  As an Agricultural Educator, I think of this as another opportunity to teach my kids about agriculture.
  5. I pull out all of the ingredients and utensils needed to prevent a lot of running around the kitchen.  This allows me to stay focused on my girl.  As she grows, I will have her read the recipe to me as I gather to further integrate her into the process.
  6. I keep the environment happy and light.  Will things get messy?  You bet!  Will we end up having to re-count or re-measure?  Yep!  Just laugh and make sure you schedule plenty of time so the rest of the family isn't waiting to be fed.  I also provide lots of feedback and positive conversation to prevent frustration and stress.
  7. I also use the time to teach and reinforce practical math, listening and processing skills.  Since my girl does not yet know how to read, I read the directions and then ask her what we need to do.  I also have her count as we add 1, 2, 3... of something.  She loves participating and I love teaching.
  8. All chopping with knives, bringing things in and out of the oven, and most stovetop cooking are done by me.  If something can be cut using a butter knife or plastic knife (ie. chopping strawberries), it is delegated.  As she grows in skill and confidence, she can begin to take on more of these responsibilities with adult supervision.
  9. I have Wee One help plate before we serve.  This way, she can take even more ownership over the meal AND sees the end result of her efforts.
  10. In our family, we make sure we praise Wee One's efforts while enjoying the dish.  Everyone takes turns thanking her for her delicious efforts.  She eats her meal with a smile, often cleaning the plate!

A particular favorite of my girl's is Breakfast for Dinner.  Mini German Pancakes with Fresh Berry Compote is always a hit and she can do virtually all of the prep!  We serve them with bacon to make Daddy happy.  Who am I kidding... we serve them with bacon to make EVERYONE happy!!


Mini German Pancakes with Fresh Berry Compote
1 cup milk
6 eggs
1 cup flour
1/2 tsp salt
1 tsp vanilla
Zest from one orange (1 tsp +/-)
1/4 cup melted butter

Preheat the oven to 400 degrees F.  Grease two muffin tins well and set aside.

Using a blender, add the first 6 ingredients and blend until smooth.  Ask your little helper to man the machine and tell you when all of the flour has been incorporated.  Add butter a little at a time to temper eggs.

Evenly distribute batter to muffin tins (slightly less than half full).  Hint:  using an emptied and cleaned plastic catsup bottle to fill the tins, makes this job easy for little hands.  Bake for 15 minutes or until puffy and golden.  Remove from tins and serve pancakes while still warm.


Fresh Berry Compote
1 cup blueberries (fresh or frozen)
1 cup blackberries (fresh or frozen)
1 cup strawberries (fresh or frozen)
Juice from 1 orange
2 tbsp water
Sugar (depending on the sweetness of the berries - a couple of tablespoons to 1/4 cup)
2 tbsp cornstarch

Add berries to saucepan with juice and a little water.  Turn on medium heat and cook until berries begin to burst.  Blend sugar and cornstarch together so no lumps remain.  Add to the pot and continue cooking for a few minutes, stirring frequently, to allow mixture to thicken a bit. Serve over Mini German Pancakes and top with fresh whipped cream or a dusting of powdered sugar.

Delicious!!!


Wednesday, August 08, 2012

A Peppa Pig Birthday!

When the Wee One proudly announced she wanted a Peppa Pig birthday party, I was less than excited.  In fact, I tried to encourage her to choose a color-themed party since they are much easier to produce.  For as long as I can remember, I have considered character-themed parties to be tacky.  Who wants a plastic bag filled with little junk which breaks within moments of getting it home?  Don't get me wrong, I have seen some character parties done well but there are soo many which are hosted exclusively by the Wal-Mart party aisle or Oriental Trading Company.  They lack soul!  Additionally, I had no idea where we would purchase anything with Peppa's sweet picture since her merchandising is not currently sold in the US.

What was this Momma supposed to do?  Break the heart of her soon to be three year old?  Not on your life! With a little determination and the help of a Cricut, Google Images, and my talented family we set out to create a homespun Peppa Pig 3rd Birthday Party.

The invitation... 

(Hint:  Must be read with a British accent!)  I asked Wee One what Peppa would like for her to do at the party.  She said, "Umm.... eat chocolate cake and... jump in muddy puddles!"  An invitation was born.  I do not possess special design skills so I used Microsoft Word to create the invitation.  It worked... people showed up to the party!!


The decorations... 

I used the Cricut to cut out letters then mounted them to card stock.  I hung twine and attached each item with a wooden clothespin.  The addition of the precious characters added charm and delighted the Wee One as she did a lot of smiling and giggling.  It was also fun to introduce our extended family to this special family. 

Fun scenes from the show.  Everyone loves jumping up and down in muddy puddles!
 The all-important stars of the show!


The cupcake picks... George DID make an appearance!


The cake... (Hershey's Perfectly Chocolate Cake of course!!)

As a family, we do not care for fondant so we knew we would be creating a frosted cake.  Additionally, we had just returned from a week at Bible Camp so designing an elaborate cake was out of the question (too tired).  I printed these images onto card stock from Google Images and mounted them onto sandwich picks with hot glue.  They are double sided.

And we just HAD to make cupcakes... (Orange swirl with buttercream)

Orange Swirl Cupcakes / Cake

Yellow Cake Mix (your favorite)
1 - 4oz box orange gelatin
1 tsp orange extract

Prepare cake mix according to package instructions.  I like to substitute milk for the water and butter for the oil.  I also add an extra egg if I am feeling saucy.  These substitutions create a richer, less "mass-produced" tasting cake.  Once mixed, reserve 1 cup of the batter in a bowl and add the rest to the cupcake papers.  (Works well as a bundt cake too!)

To the reserved batter, add the gelatin and extract.  Mix well.  Place a dollop of orange batter onto the plain batter of each cupcake and using a skewer, swirl in.  If you are preparing a bundt, place in four dollops on top of the plain batter and swirl using a butter knife.

Bake according to package directions.  Cool completely then frost!

The games...

Pin Peppa in the Puddle...
I printed Peppa onto card stock and cut her out, one for each player.  I added double stick tape to the back.  I added a "muddy puddle" to a sheet of blue poster paper and each participant took a turn.  As you can see, the kids did VERY well.  :-)


Feed Peppa Grandpa Pig's Tomatoes (toss game) --
We used a thick science project board and my sweet mother painted Peppa on the back side.  We cut out the mouth and used little red balls as the "tomatoes."  It was a HIT!  After two weeks, my daughter is still playing the game! 


The favors...

A Peppa Pig coloring book!  I found the images online and added them into a Word Document.  I then copied them, one per party guest and one for each child in her classroom.  Everyone also received a box of Crayola Crayons!

And chocolate coins!!!  I printed the tags onto card stock.  I got the cellophane bags at Target and the chocolate coins at Rite Aid.