To celebrate two glorious occasions, we hosted a farm birthday party at a nearby dairy. Come join the fun!

Invitations
Prior to making invitations, I sought permission from the dairy managers to have the party at the site. Then, I scoured Google Images to find this gem. I placed it into Microsoft Word and prepared this invitation. I printed the invitations onto white card stock and used a paper cutter to cut them out. Ready for delivery!

Decorations
I kept the decorations to a minimum since the party was held at a dairy. I purchased red table covering from Target and Dollar Tree. As I covered the tables, I realized while the table coverings from Dollar Tree were very cost effective, they weren't as thick and richly colored as those from Target. I placed the Target covers in high profile locations and places in need of extra durability.

I used a chicken wire covered wood frame to feature a banner with Wee One's name. I made it using Microsoft Publisher. I searched Google Images for the cow, pig, and red textures. I used the Annoying Kettle font. Once I designed each section of the banner, I printed them on card stock and cut them out. I strung a piece of twine across the top of the frame and used small clothespins to affix each to the twine. I used another string to hang the frame from a tree. It was definitely a hit!


Activities
Up to this point, my daughter's parties have always been family parties since my family lives 3 1/2 hours away. This year, because of her friends parting ways to attend their various kindergartens, we chose to host a friend party. Being an agricultural educator myself, I convinced my daughter to go with the farm theme in order to get a little ag literacy into each sweet soul before they go off on other paths. I set up the party into stations and created signs stapled to stakes indicating each one.
Station 1: Face Painting
My mother is an elementary grades reading specialist with MAD painting skills. She has been painting the faces of first through third grade aged children for no fewer than 20 years. To ensure her availability, I booked her face painting magic one year in advance. The kids LOVED the face painting! She had kids at her station from the start of the party until it ended. I felt awful she had to work the entire party but she had a ball talking with each child and making their wish for a special character come to life on their faces and arms. Check out her work!


Station 2: Stick Horses
Horses have had a rich history with agriculture. They have been used to herd animals, pull equipment and transport goods to market. I found a template for a stick horse here and printed out copies of the horse's head onto white card stock. I also flipped the image so I could have the other side of the horse's face. That way, when it was time to assemble, the horse could be viewed from the left and the right. The station was stocked with horse heads, washable markers to personalize each horse, yard sticks, yarn reigns and a stapler to adhere the horse to the stick. Each horse had a hole punched into the corner of the mouth for the reigns. The children loved their stick horses! Cones were set up for racing and many children couldn't wait to get started. They burned off a lot of energy!


Station 3: Dairy Tour
Two people were on hand to offer our group a tour of the dairy. Our tour guides walked the children and their parents through the milking barn, the cow barn, the feed barn and of course through the calf barn. The children listened intently to their guides and asked a lot of questions. Each was thrilled to learn about the cows from experts. Did you know the typical cow produces an average of 6 gallons of milk each day? While everyone loved the cow barn, the biggest hit of the day was the calves. The calves were so social and eager to meet the children, especially the Jersey calves since they are a little bolder than the Holsteins. While we were careful not to touch the animals in order to prevent the spread of disease, the children could not take their eyes off of them. I think the parents were equally mesmerized.


Station 4: Butter Making
The children made ice cream at school earlier in the week so we chose to make butter instead. I set up the station with 5 1/2 ounce souffle cups with lids, heavy cream, a salt shaker, an ice chest with ice, and a sharpie. The kids were invited to take part. They were each handed a cup filled 1/4 to 1/3 full with heavy cream. They were instructed to secure their lids and shake their cups until the contents went from liquid, to foam, to solid with a watery liquid. At that point, I poured off the watery liquid and added the child's name to the cup lid. I placed each container of unsalted butter into the ice chest until the end of the party when they could take it home. Those who wanted to try it right away were given a cracker to slather.


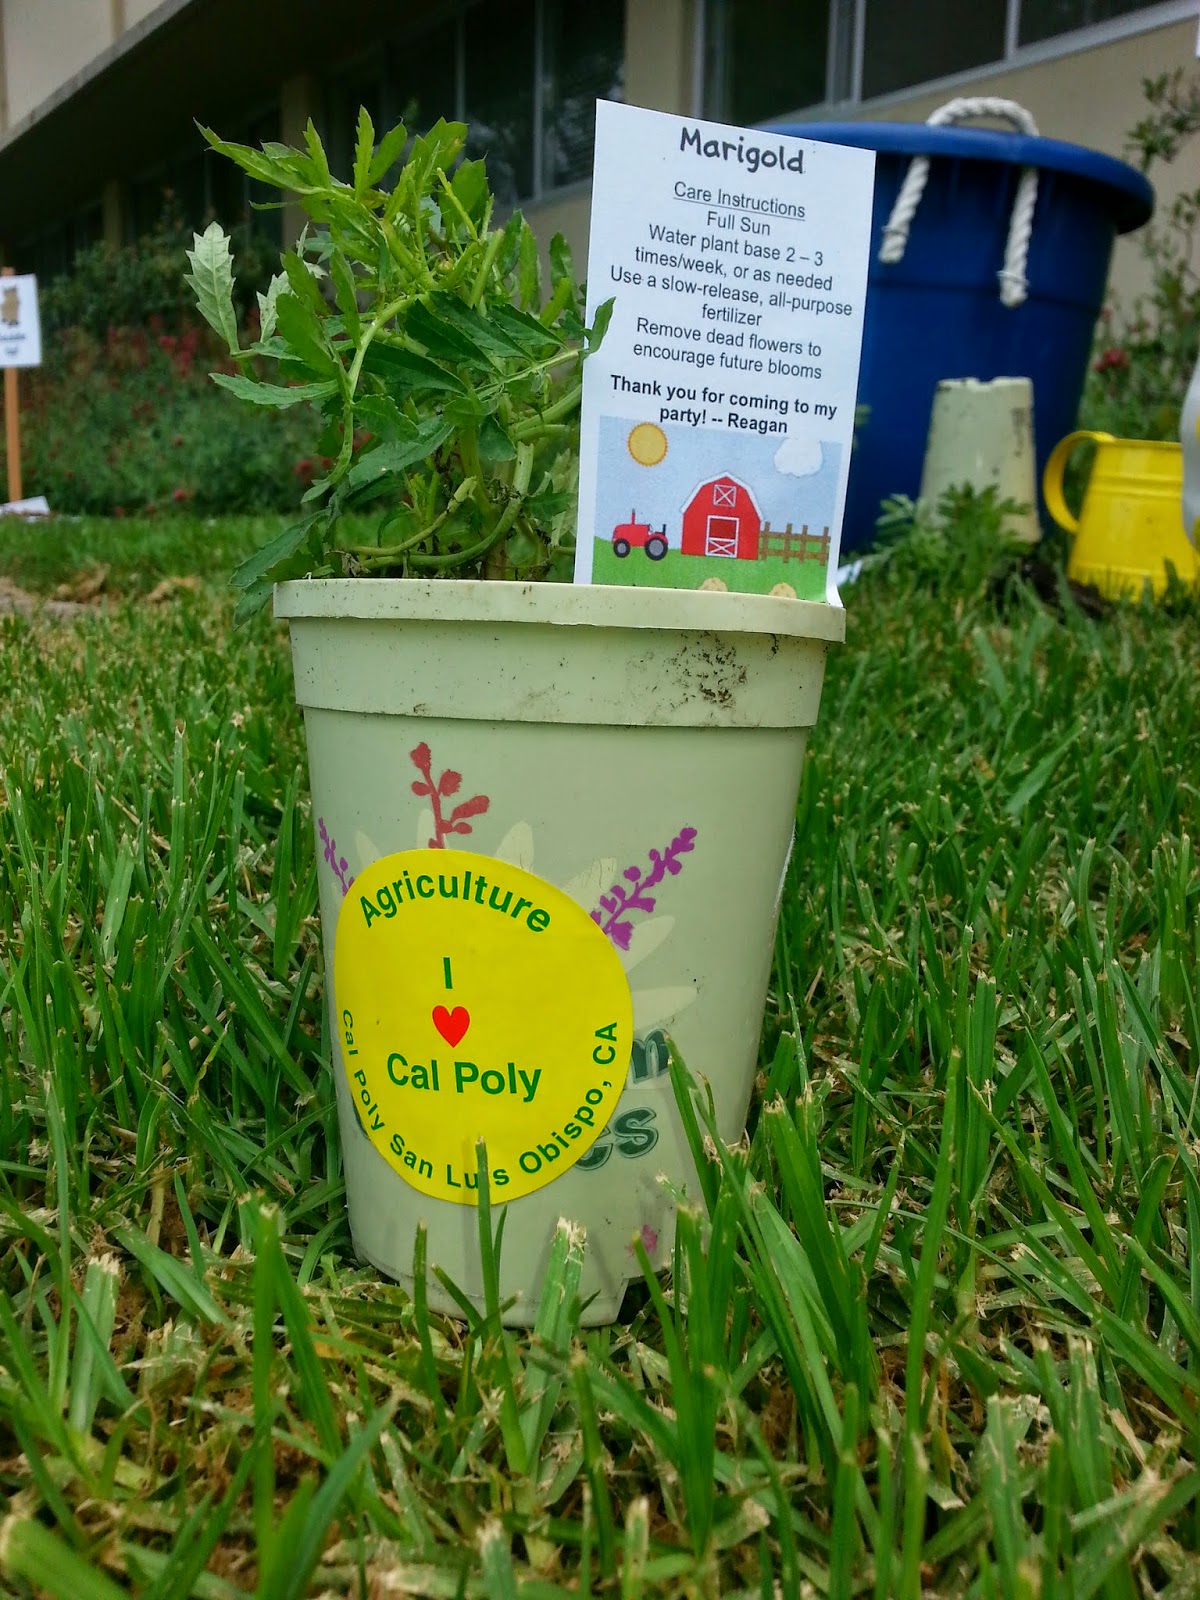
Station 5: Planting Season
Horticulture is a growing industry in agriculture! In 2012, California's nursery industry was worth $3.453 BILLION. That is some serious GREEN!! The children got to try their green thumbs at transplanting marigolds. I demonstrated the process for the group and they were each offered the chance to pot a flower of their own. Once potted, I added their names to the outside of the pot and they placed a sticker on the outside celebrating their good work. The final element was a care tag they carefully stuck in next to the plant. I made the care tags by designing in Microsoft Publisher, printing on card stock and affixing to popsicle sticks with hot glue.


Station 6: Barn Pinata
The pinata was another homemade creation. Find the details here. The kids had a great time beating the barn... although it took a while to break into the candy. They were so gentle with their swings! I loved witnessing the delight in each child's eyes when it was their turn at bat. Once the first pieces of candy hit the ground, they went for it like a pack of wild dogs. Even the teeny tiny kids dove in! I armed each child with a cellophane bag bearing their name so they would have a place to stash their claims. They were able to place their candy bags into their goody bags to take home.


Food
With a kid-centric event, I chose a very simple menu. The hubs barbequed Hebrew National hot dogs and I served beans, pasta salad, tortilla chips and salsa, carrots and ranch dip, strawberries, grapes, cherries and blueberries. We had plenty of water, iced tea, chocolate milk and juice on hand for all to enjoy. By the way, the shade tree was AMAZING. It was an unusually warm day on the Central Coast so everyone tried their best to remain under the branches.


Cake
We love chocolate cake in my family but we aren't big on the over-decorated, fondant-covered, sugar-coma inducing variety. To simply decorate the cake in accordance with my daughter's theme, I located the Holstein cow and calf from the toy chest washed them with warm, soapy water then allowed them to air dry. I printed out a number five from the computer and cut it out carefully. This left a number five-shaped hole in the white copy paper. Once frosted, I laid the white paper on the surface of the cake and added pink sprinkles into the five-shaped void. Why pink? The girl loves it! Because there were a number of rogue sprinkles on the paper, I used a piece of transparent tape to lift them off rather than allowing them to stick into the frosting below. Once clear, I lifted the white paper from the surface of the cake to find a perfect number five. Then, I placed the five-shaped silhouette on top of the five-shaped sprinkles to protect the area from the green sprinkles I applied over the entire surface of the cake to represent grass in a pasture. After removing the number five silhouette, I added the cow and her calf and later the barn shaped candle. Wee One loved the result!


I also had strawberry cupcakes with cream cheese frosting on hand for the kids. I topped each one with a homemade pick featuring a number of different farm animals I found on Google Images. Find the instructions here.


Goody Bags
Since the children would be taking home their pinata candy, marigolds, stick horses and butter; I provided a larger bag to carry their goodies. I decorated the front of the bag with the same image from the invitation and added some educational literature about agriculture. Inside, was an issue of What's Growin' On?, a free publication for school children produced by California Foundation for Agriculture In The Classroom. I printed copies of this farm booklet which had a variety of pre-write activities to help the kids prepare for kindergarten, along with a pencil to get started right away. To dove tail with the dairy tour, I added a handout with a few web resources inviting families to seek more information about the dairy industry. Feel free to visit: Dairy Carrie's blog, the Dairy Mom blog, a great video explaining milk's journey from cow to grocery store, and another video featuring an interview with dairy farmers about their work on the dairy.

You know you have hosted a great party when the kids willingly take naps and are still talking about the event days later. We are blessed by the friends my daughter has chosen as they are polite, kind, and loving... and have some pretty special families. It made the party a fun experience for all.

Happy 5th Birthday, Wee One! We love you!!


