Thursday, February 21, 2013

It's Tricky - Run DMC

Since this blog is about little things that make me smile...

I really enjoy the show Suburgatory.  The show offers a campy glimpse into the self-indulgent behaviors of American suburban communities.  Last night's episode, T-Ball and Sympathy, featured a fun song from the 80's.  Who doesn't enjoy 80's rap?!  I have tried to get the song out of my head all day but decided why?!  Why try to forget when I can embrace?  Press "play" and commence goofy, uncoordinated dancing around the room!!


It's tricky, tricky, tricky...

Monday, February 18, 2013

Downton Abbey Finale with Pavlova

Since last night's Downton Abbey was the season 3 finale, I wanted to make something a bit special... pavlova! 


Pavlova was big in the 20's... which is around the setting of the current season.  This was a bit of an adventure for me since I have never tasted it before and had no idea what I was shooting for.  Turns out, it was quite a success!  The hubs was extremely pleased and ate most of the pavlova.  All I could think of was how the cloud-like dessert reminded me of the sumptuous garments they wore in last night's episode.  I thoroughly enjoyed the trip to Scotland.  Did you?

I must say, it was fun reading all of the Facebook updates as my friends reached the end of the episode.  I couldn't help but think of how Violet would have responded to all of the chatter.  I imagine it would have sounded something like this...


Image retrieved from the Downton Abbey Facebook page.

With that in mind, let's make a Pavlova!


Ingredients:
4 large egg whites (room temperature)
Pinch of salt
1 cup sugar
1/2 tablespoon cornstarch
1 teaspoon vanilla
1 teaspoon white vinegar
Whipped Cream (See below)
Raspberry Sauce (See below)

Directions:
Preheat oven to 250F.  On a sheet of parchment, draw a 7" circle with pencil.  Turn the parchment over and lay onto a baking sheet.  The outline should be visible.

In the bowl of a large stand mixer with whisk attachment, add egg whites and salt.  Begin on low and proceed to medium speed.  Continue mixing for 2 - 3 minutes, until the whites become bubbly and soft peaks begin to form.

In a small bowl, combine sugar and cornstarch until there are no lumps.  Turn mixer to low.  Slowly and steadily add the sugar mixture to the egg white mixture.  Once incorporated, return mixer speed to medium high for another 3 minutes.

Add the vanilla and vinegar together in a small bowl and begin to slowly add to the egg mixture.  Continue on medium high speed for another 4 to 5 minutes, until the meringue takes on a glossy, fluffy appearance.

Pour meringue onto parchment, creating a smooth but fluffy disc.  Create a well in the middle of the circle (edges should be slightly higher than the middle).

Place into a 250F oven for 1 hour 15 minutes.   Bake until the outside is dry and has a cream color.


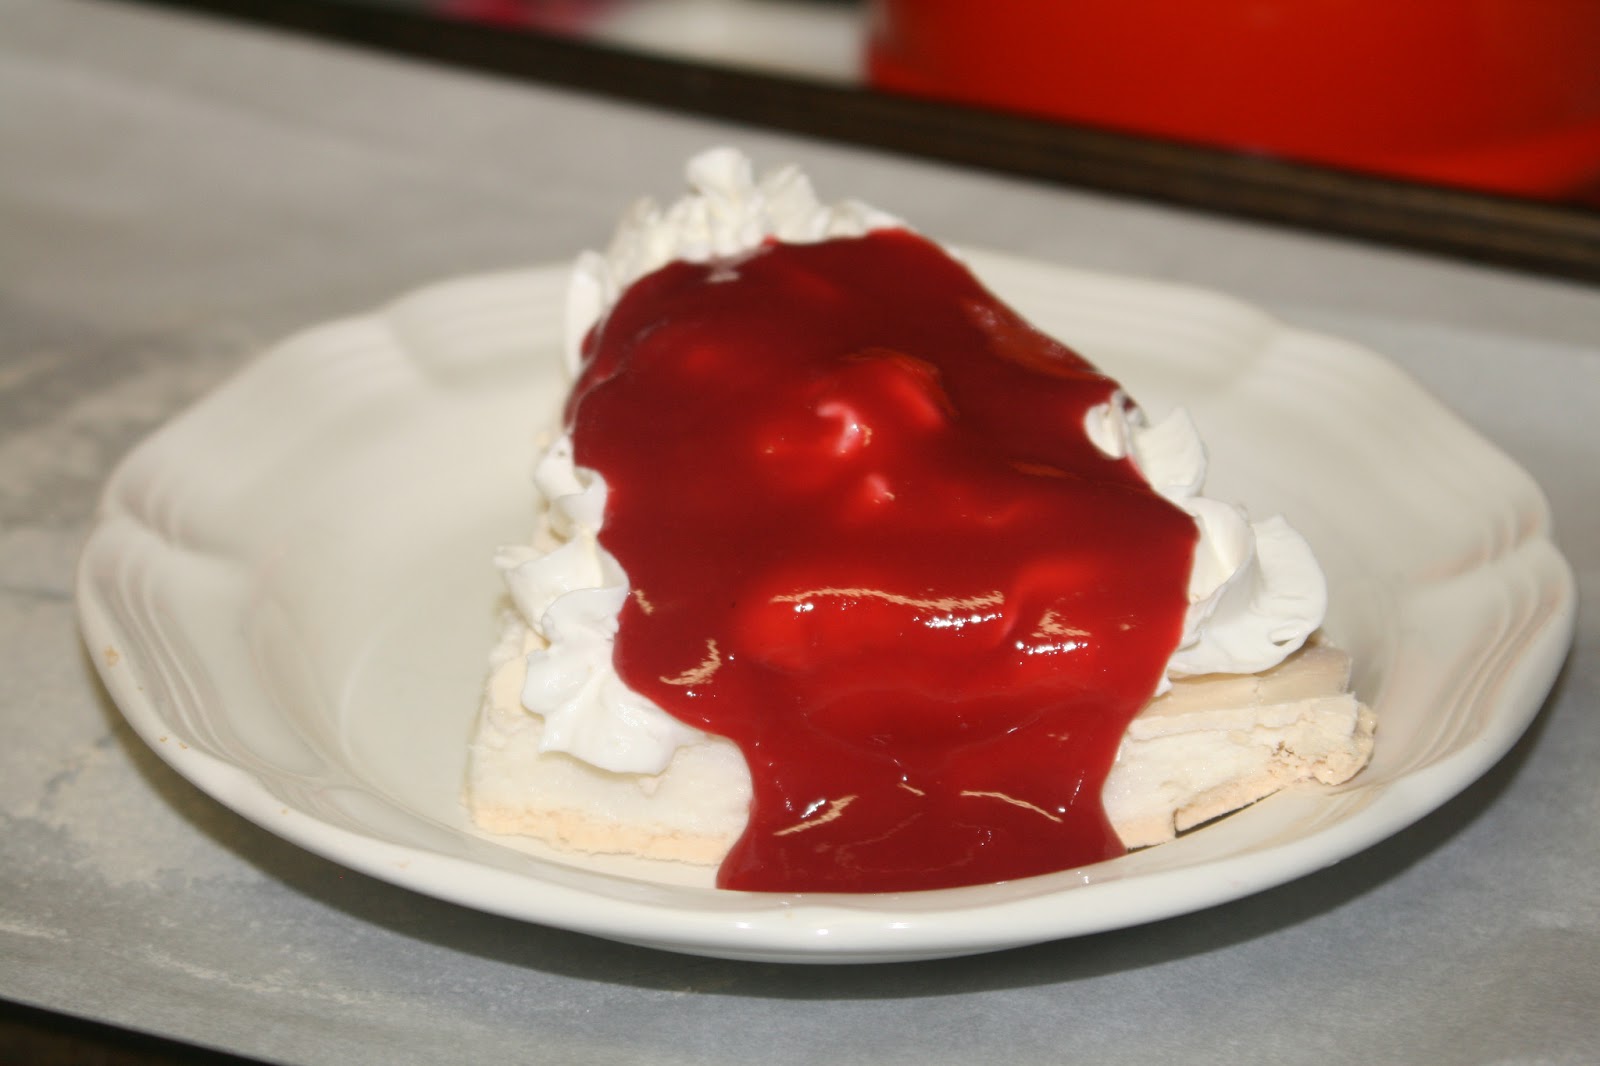
Turn oven off and open the door slightly, allowing meringue to remain in the oven for another hour or more to cool.  Once cool, peel the parchment off of the bottom of the meringue and place onto a serving dish.  Pavlovas have a crispy exterior and a soft, cloud-like interior.  They are prone to cracking.  This is NOT a problem... just indicative of success.

Pavlovas are traditionally topped with whipped cream and fresh fruit (strawberries, raspberries, kiwi...).  Rather than the fresh fruit, I made a fresh raspberry sauce (see below).  Beautiful, isn't it?!

Let's look at it from another angle.  Ahh... in all of its luscious glory.

If serving a crowd, cover the entire meringue with the toppings for effect, then cut and serve.  However, since it was just the two of us I preferred to cut the meringue and top each slice individually.  This way, I could place the leftover meringue in an airtight container to save for the next day... not that there was much left.


 Bon Appetit!


Whipped Cream:
8 ounces heavy cream
1 to 2 tablespoons sugar (depending on desired sweetness)
Splash of vanilla, about 1 teaspoon

In a large bowl, combine ingredients.  Beginning on low and slowly increasing speed to high, mix until firm peaks form.  Stop before butter is created.  Pour into a container, cover and refrigerate until ready for use.

Raspberry Sauce:
2 clamshells of fresh raspberries (can also use a 10 ounce bag of frozen)
splash of water
3 - 6 tablespoons sugar (depends on sweetness of berries)
1 teaspoon corn starch
squeeze of lemon juice

In a small bowl, mix 3 tablespoons sugar with cornstarch and set aside.  In a saucepan, add berries with a splash of water.  Turn burner to low-medium and allow berries to heat.  They will begin to burst and release their juices.

Add the sugar mixture and stir in, preventing clumps to form.  Allow the berries to cook until they thicken and get bubbly.  Taste the mixture.  If more sugar is added, add the additional sugar to taste. Remove from heat and stir in lemon juice.  Pour mixture through a sieve to remove seeds.  Pour sauce into a heat-safe bowl, cover and refrigerate until ready to use.


Friday, February 15, 2013

Valentine's Day Celebration!

How did you celebrate Valentine's Day?  Here is what we did.

First, I decorated.  I set everything up the night before.  This way, when they woke up and headed downstairs, they walked into a Valentine's Day dream!  They squealed with delight.  Sister even said, "This is beautiful!"  Warmed my VERY tired heart.


Next, I set up a treasure hunt.  The kiddos LOVE treasure hunts.


Success!  They found the treasure!  See's chocolate foil hearts and an outfit to wear on Valentine's Day!
 

She found it!!!  Oh, and brother just HAD to bring that hanger with him.
 

Cutest little Valentine in red pajamas no less!

Running with chocolate.  Smart boy!  Sister will likely try to eat his too!


 Love the "bed head."

Chocolate in the morning?!  You bet!
 

Made a breakfast of champions...

Mmm....
 
And packed up a LOVE-ly lunch!
 

Once ready for school, we grabbed the valentines for our classes and headed out.  Sister had brownie pops and brother had Goldfish crackers.


And a LOVE-ly dinner!  Mini heart pizzas anyone?  The kiddos helped add all of the toppings... and brother helped himself to whatever was added.  Who am I kidding, he also tore off pieces of the dough.  He doesn't discriminate.  He apparently couldn't wait for it to be baked.  (I am also noticing the heart cookie cutter got quite a workout!)


 Oh, and red Jello with peaches too.  We spared no expense.


 Modeling their Valentine attire at the end of the day...


And a little homemade chocolate pudding with plenty of whipped cream for dessert. We love pudding around here.
 

After bath and putting brother to bed, we looked at all of the class valentines.  I also got to learn about all of her friends and hear some funny/interesting stories.  Happy moment!

A closer look.

My personal favorite.  Good job, Everett's mom!

My least favorite.  This was a glitter bomb.  Inside this sweet little box was a TON of gold glitter and stickers.  Ugh.  ALL over the carpet.  No bueno.  This mom is NOT my friend right now. (Insert grumble, over the big mess and glitter in the eyes, here.)  At least Sister enjoyed the surprise.

Happy Valentine's Day!  
Hope you spent it with the ones you love.

Valentine Brownie Pops

In an effort to provide a Valentine my daughter could help make, while still being unique, I thought cake pops would be a fun addition to the class haul. 

I also wanted to use a cake pop pan as opposed to the rolling method because there is less "junk" added.  Having never made cake pops before, I charged ahead... confident in my baking skills.

WHAT WAS I THINKING?!!  

I really hated this entire process and plan to never do it again... at least that is my feeling at this point in time.

Here is the whole nightmare-ish process.

First, I made cake pops.  Actually, I made brownie pops because I purchased a Nordic Ware Cake Pop pan and found they recommended using the recipe on the packaging.  Well, I didn't have any chocolate chips (Thank you, Hubs for eating them all.) so I thought homemade brownies would work just as well since dense cakes work better when using the cake pop pans.

The recipe I used...

1 stick unsalted butter, melted
1cup granulated sugar
1 teaspoon vanilla
2 eggs
1/2 cup flour
1/3 cup cocoa
1/4 tsp baking powder
1/4 tsp salt

Preheat oven to 325F.  In a large bowl, mix the butter, sugar, vanilla and eggs well.  In a medium bowl, sift together the flour, cocoa, baking powder and salt.  Stir the dry ingredients into the wet, blending well but not over mixing.

Spray both sides of the cake pop pan very well with cooking spray.  Fill each divet (on the side with no holes) with 1 tablespoon of batter.  Secure the top lid and place into the oven for 15 minutes.  Brownie balls are ready when an inserted toothpick comes out fairly clean.  A few crumbs is fine.

Place pan on a wire rack to cool for 2 to 3 minutes.  Then, remove the top pan and turn the brownie balls out onto a wire rack to cool completely.  Once cooled, remove the excess ring of brownie with a sharp knife or kitchen shears to smooth.  If still pliable, gently press the excess in to save time and hassle.

Before (Notice the ring around the center)
 After (No ring... or at least less of one)


If any of the brownie balls are cracked or broken, they will not hold up through the coating process.  So, enjoy!

If you have more to make, wash and dry the pan and begin again. 

The Pop-ification  process...

Ingredients:

  • Almond Bark  (for 24 brownie pops, use only 1/2 of the package)
  • Sprinkles
  • 24 cake pop sticks
  • Brownie balls (be sure they are not cracked)


Remove the Almond Bark from the package and place into a glass dish.  Melt in the microwave starting at 90 seconds, stir, then continue to melt at 10 second intervals... stirring each time.


Dip a stick into the melted candy and insert about 3/4 of the way into the brownie ball.  Continue until all have sticks.  Place the dish into the freezer for a few minutes to give the melted candy time to set.  This will make certain the stick is secure.


Begin dipping the brownie pops into the melted candy.  It is helpful to use a spoon or spatula to coat the pop rather than twisting it around in the candy.  This will prevent the brownie ball from coming off of the stick or breaking apart in the candy.  Allow any excess to drip off.


Immediately add sprinkles to the melted candy coating for a festive touch.  My daughter had a blast performing this step... at least for a little while.  Place the pop onto a plate or baking sheet lined with plastic wrap and place into the freezer for a few minutes to set.


Once set, remove from the freezer and package into pretty cellophane bags.  Keep away from heat!  These can be made a week in advance.


My issues...
While these pops were DELICIOUS, they took a lot of time to prepare.  I also became frustrated with the fact the sprinkles wanted to slide off of the pop after dipping.  To help with this, I made sure all of the excess had completely dripped away and once the sprinkles were added, they went into the freezer right away.  These tips helped a bit.  I would even recommend working with cold (but not frozen) brownie balls.  This way, the candy begins to set rather quickly.

Maybe some time away from this project will make me want to do it again... but I am not confident about that.  At least not yet.

Enjoy!