Minnie Mouse Pinata
Having gone to a few of her friends' birthday parties, the Wee One learned she LOVES pinatas. To make sure her birthday pinata matched her desired party-theme, I chose to make a Minnie Mouse pinata.
Nice, huh?! I can proudly say, I have made a pinata.
I will likely never make another.
It is a lot of work for something you smash with a bat!!
Here is the process:
1. Gather the materials: cardboard (use thinner cardboard), pencil, scissors, overhead projector, desired shape, masking tape, glue, tissue paper and any embellishments.

2. Place the shape onto an overhead projector and trace it onto the cardboard, to the desired size.

3. Cut out two identical sizes of the same shape. Make sure one has notches on the sides to make for easier attachment of the sides. These do not need to be pretty or perfect.


4. Fold up the sides of the notches and affix with masking tape to strips of cardboard of desired width. I used the flaps from a box, cut in half. I found it worked perfectly.


5. Add the other shape to the top and attach with masking tape, forming a box. Leave a hole at the top for filling with candy and prizes. Reinforce the top with tape to make sure it doesn't tear during the beating.


6. Reinforce the seams with masking tape, to ensure the candy and prizes do not fall out prematurely. I may have gone a bit overboard with my taping but the pinata did break so I guess it was okay!

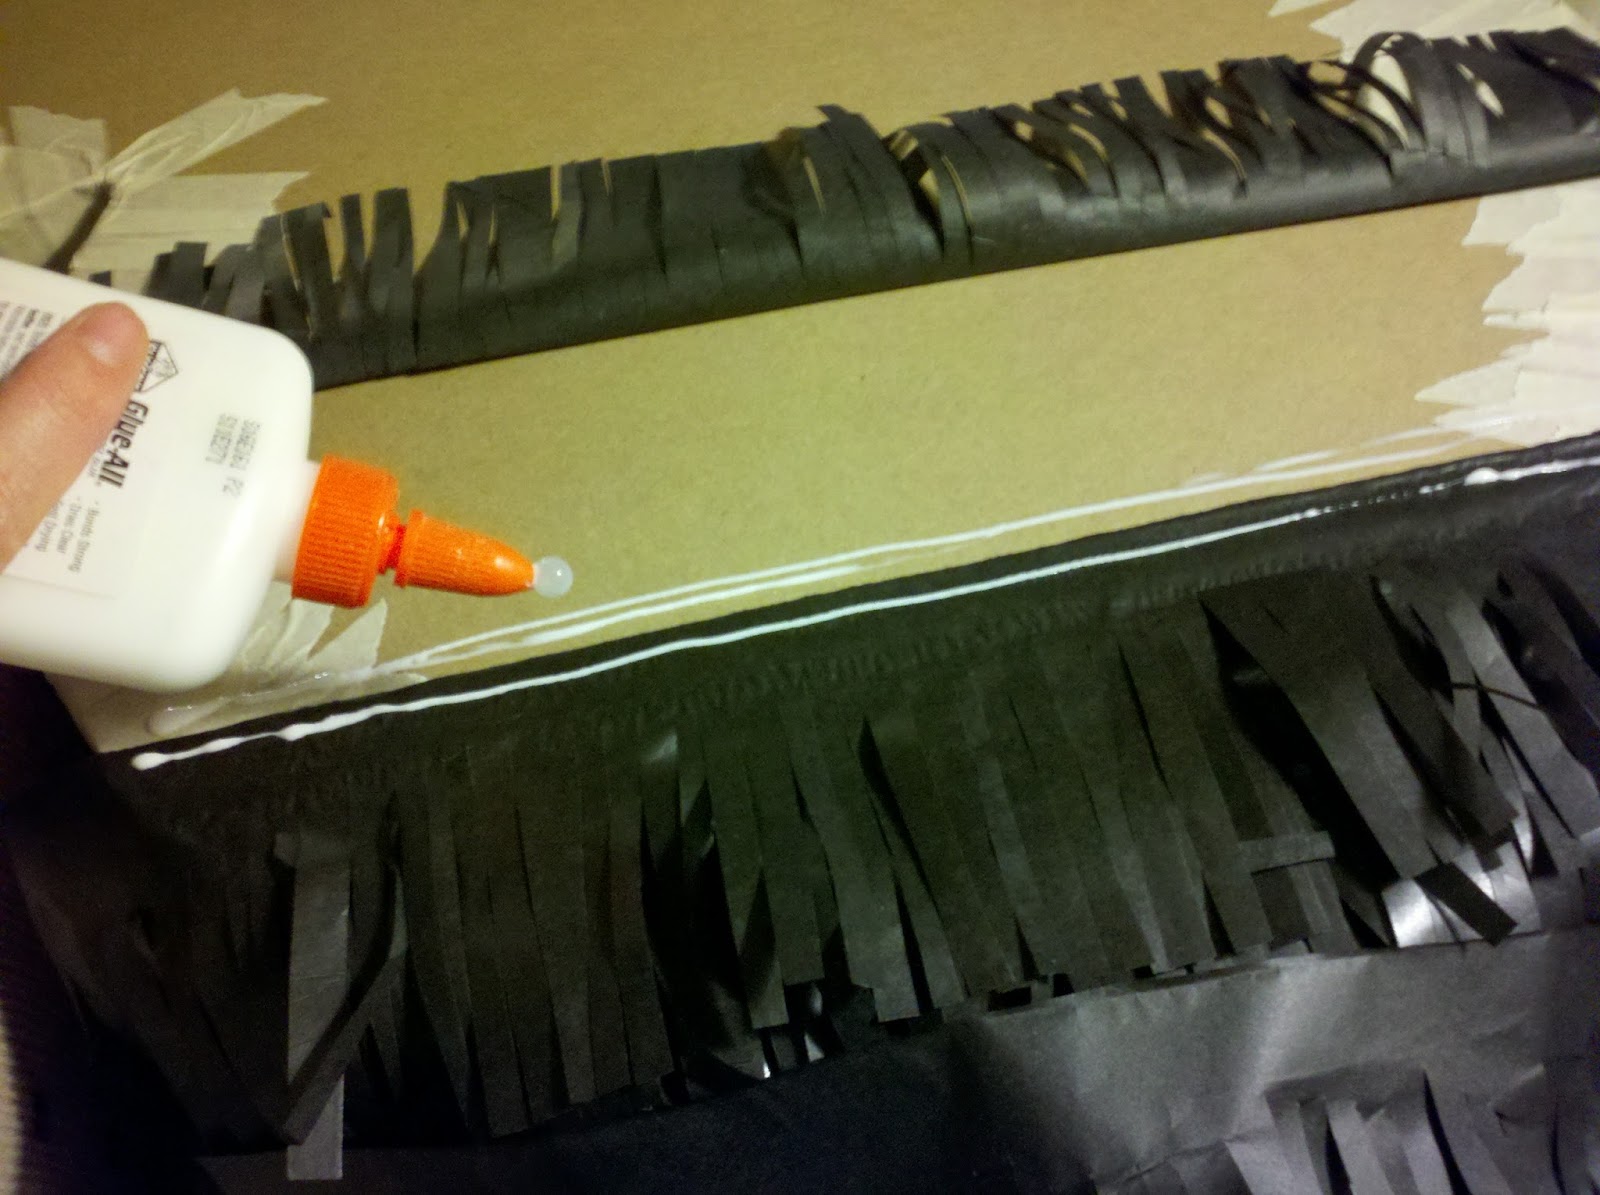
7. Cut the large sheets of tissue paper into long, even strips. Then, cut fringe 3/4 of the way into the strips. Using glue (I preferred liquid glue to glue sticks), attach the fringe all over the 3-D shape, covering all visible cardboard.


8. Attach a hanger to the top of the pinata. I used some pink yarn I had lying around. I reinforced it to be certain it would hold the weight of the pinata once filled.


9. Continue gluing the tissue paper until the entire box is covered. Trim any long, stray pieces of fringe to ensure the shape is clear.

10. Embellish with any additional details. I cut two bow shapes using the Cricut system and glued them into place on each side.
11. Fill the pinata and hang in a safe location.

12. HAVE FUN!!! Be certain to keep kids away from the swing zone. Give them bags to fill during the scramble.

I must admit, the Minnie pinata turned out pretty cute. I may just make another for the boy...
when he discovers he LOVES pinatas too.
when he discovers he LOVES pinatas too.
No comments:
Post a Comment